Table of contents
Getting Started with Projects
Friday October 20, 2023-33 min readIntroduction
Relying on a paper-based system to manage manufacturing projects not only creates bottlenecks in productivity but also limits your organization’s ability to adapt and scale effectively. As project complexity grows, manual management methods become increasingly cumbersome, making it challenging to keep pace with industry changes and evolving project requirements. The Projects app provides a comprehensive solution by unifying project components, providing a centralized location for up-to-date information, and enabling a smoother workflow for your organization.
Let’s get started
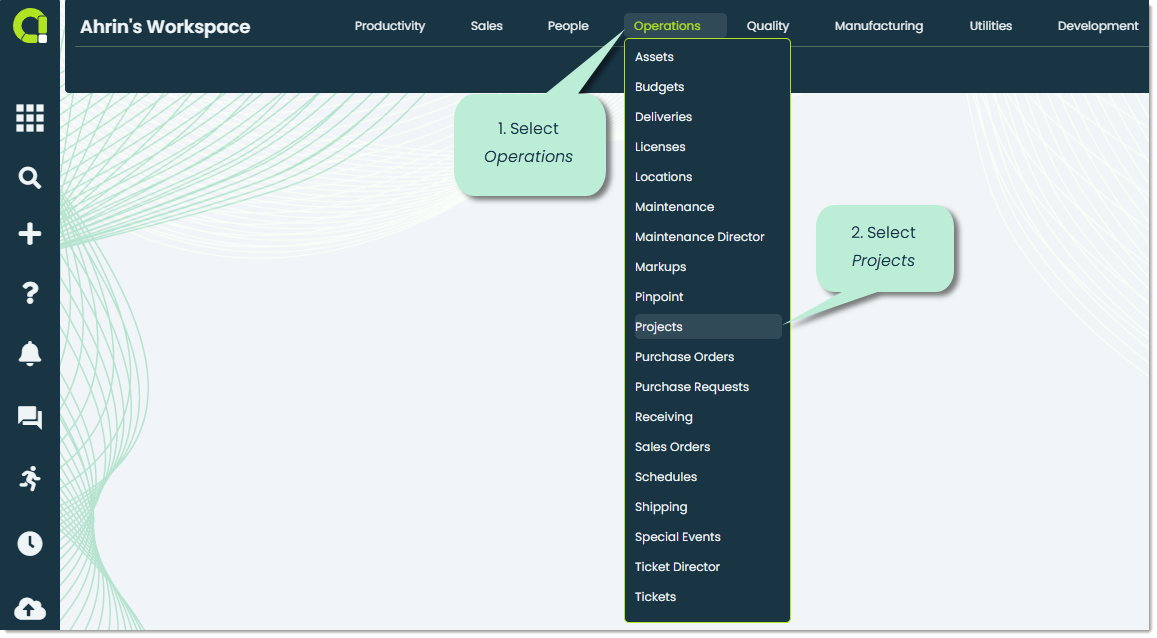
To open the Projects app, navigate to the Operations section of the main navigation bar and select Projects.
When you first open the app, you’ll be shown the List tab, which contains all of your organization’s projects.
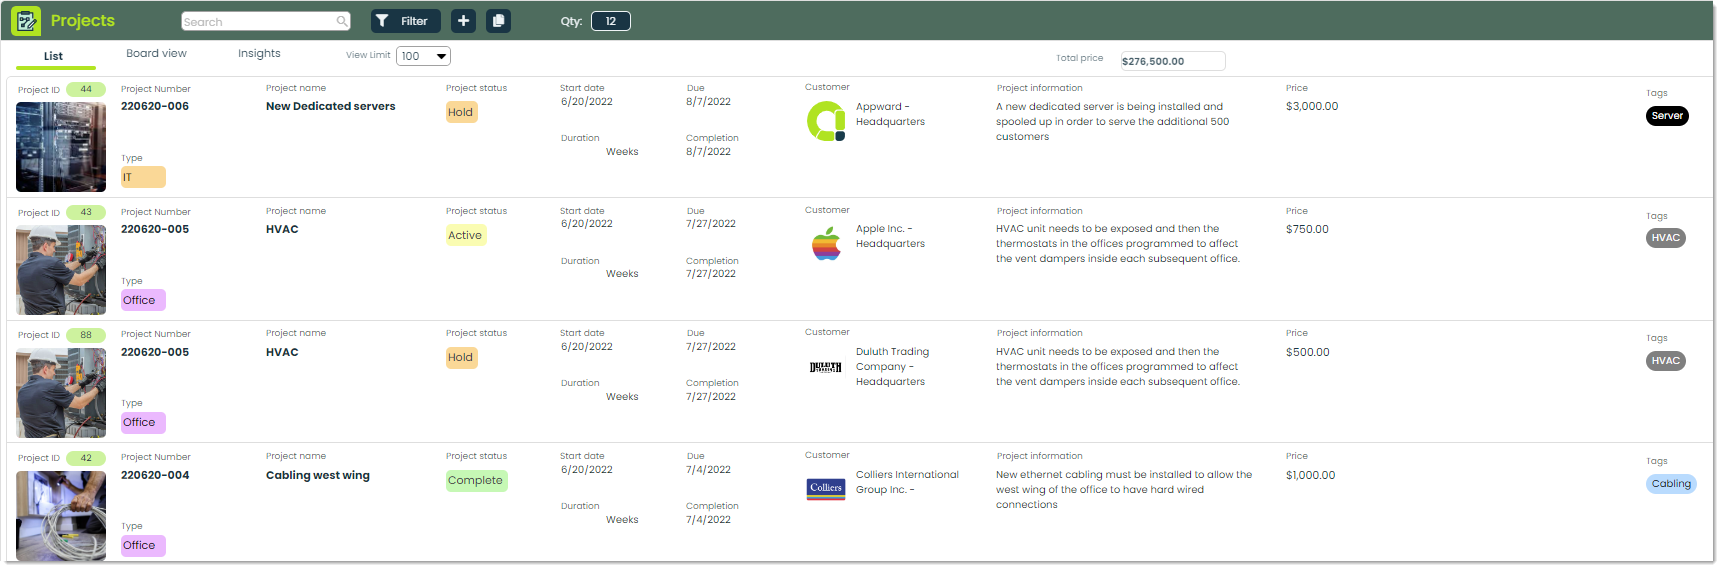
At the top of the app screen, you’ll notice some tabs. Let’s familiarize ourselves with them.
List – This tab contains all projects created within your organization in a convenient, easy-to-read list view. Projects here are sorted by start date, with the most recently started projects being the first in the ordered list.
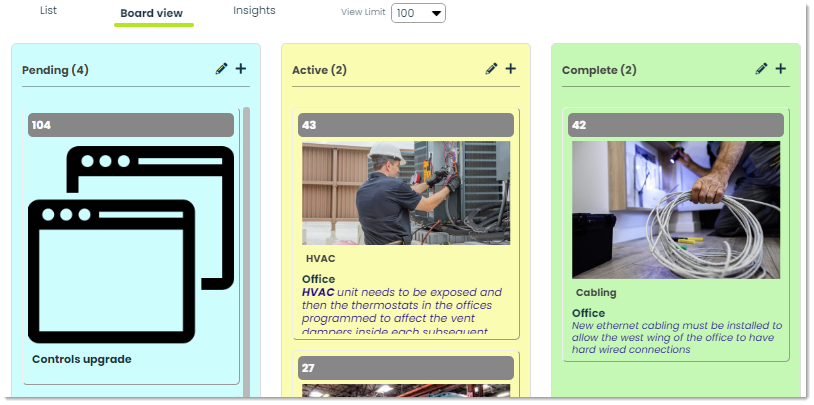
Board view – The Board view tab shows you a kanban-style representation of your organization’s projects. Utilizing Kanban boards, you can easily rearrange your projects, simplifying the management of status updates and providing a visual means to monitor project progress.
Insights – This tab is used to analyze data from your organization’s projects. With Insights, you can discover and utilize valuable information pertaining to project types, status, and price. For more on Insights, please check out our Getting Started with Insights guide.

How to add a project record
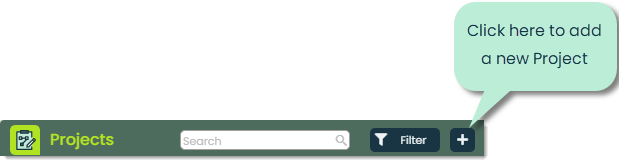
To add a new project to your organization, click the + icon at the top of the screen.
You will then be presented with the Add Project screen, where you can add details for a new project. Let’s go over the available fields for you to populate.
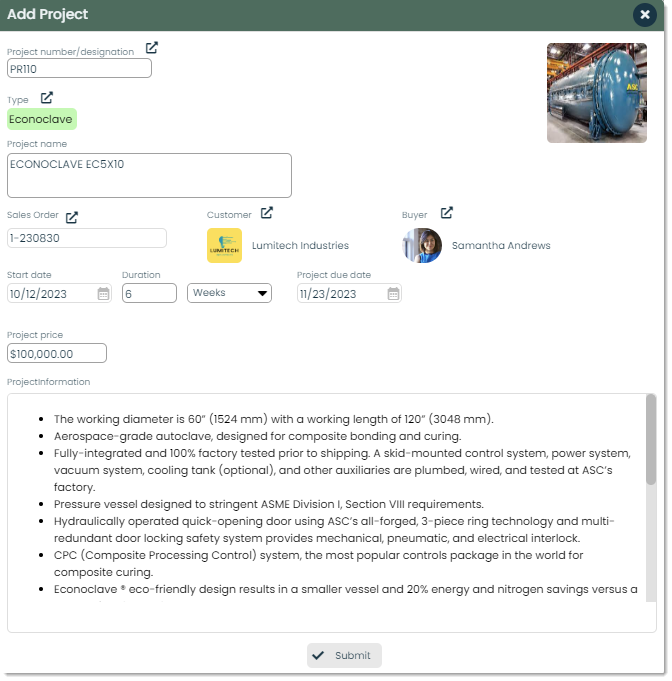
Project number/designation – In Appward, Project number/designations serve as unique identifiers for specific project records. Having a distinct project number for each project allows for efficient tracking and helps with managing and referencing them.
Type – You can categorize the project you create by the type you select. Visually, types are labels with custom names, colors, and images that can be assigned to records throughout Appward. However, types provide you with a way to organize your data in a fully flexible, customized way to suit your business. As an example, a project associated with an Econoclave could be labeled with the project type Econoclave. For more information on Types, please check out our article Using Types.

To add a Type, press the + button at the top of the Select a type popup.

Project Name – This is the name of the project you are creating. Project names should be clear, concise, and give the reader enough context to be well-informed of what record they are about to view.
Sales Order – Within Appward, the Sales Order app functions as a central hub for the management and creation of important sales records. In the Sales Order field, you have the capability to select an existing sales order record using the picker, which in turn provides you with the option to directly import all associated data. For more on how sales orders work, please check out Getting Started with Sales Orders.

Customer – A Customer is defined as an organization that purchases goods or services from your company. You can select the picker in the Customer field to open up a popup displaying a list of all your company contacts to choose from.

Buyer – This field displays the Buyer who is the individual directly associated with the sales order you import into your project record. Buyers can be thought of as the person representing or held responsible from the customer’s company.

Start date – This is the start date of the project.
Project due date – In Project due date, you can define when the project should be completed by. You can manually enter the date using the MM/DD/YYYY format, or by using the calendar picker to select a day while viewing a visual calendar.
Duration – In the Duration field, you can specify how long the project is expected to take from Start date to Project due date. You can specify if the number value you enter is denominated by days, weeks, or months by selecting your preference in the drop-down menu.
Project Price – This is where you can define the Project Price, which is a total aggregate of all the costs associated with the project.
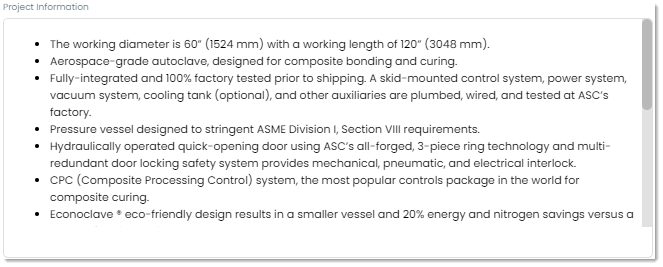
Project Information – Project information is the place where you can establish all the important and essential project details crucial for the success of your project. It serves as a guideline to help everyone associated with a project to align their efforts with the project’s goals and requirements.
Submit – When you are ready to submit your new project, simply press the Submit button to create your record.

How to view a project record
To view a project record, simply click on the row of the project you wish to view.

Upon selecting a record, a details flyout will appear, showing you all the necessary details of a project.
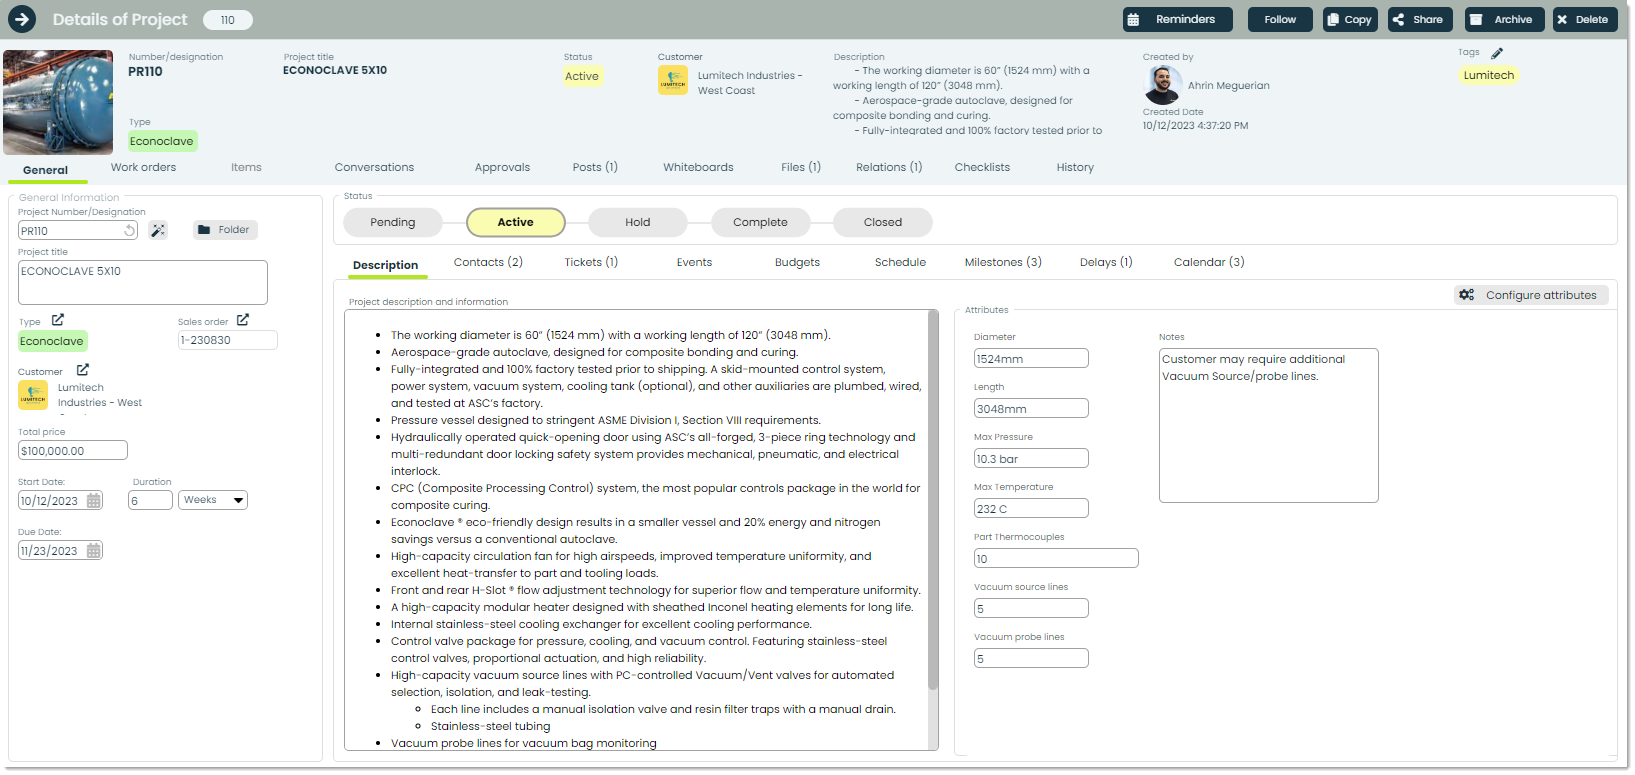
The first tab you’ll be shown is the General tab. Let’s go over the unfamiliar fields within this information-loaded tab.
Tags – Visually, tags are labels with customized font and background colors. They are used throughout Appward to provide better organization and searchability of your organization’s projects. Furthermore, tags offer additional context to individuals within your organization, enabling them to gain insights into the content of a record before they even access it. For more information on Tags, please check out our article, Using Tags.

Status – The possible status of a project is defined by five different stages. Let’s cover what each of these stages mean.
Pending: The project is still in its planning stages, nothing has been confirmed yet from the parties involved.
Active: The project is currently in the works.
Hold: The project has been paused for reasons defined by the parties involved.
Complete: Most of the project’s tasks have been completed, and it is ready to be closed.
Closed: The project has been closed, meaning parties involved have agreed that the project has been completed.

Folder – Folder is where you can view all the files associated with the project record, conveniently placed in an organized folder and viewable within Appward’s File Explorer.

In the General tab, you’ll find internal tabs that seamlessly incorporate features from other apps within the Appward ecosystem. Let’s cover what each of these tabs have to offer.
Description – In Description, you can view and edit a field designated for describing the project or providing any additional information you think is required.
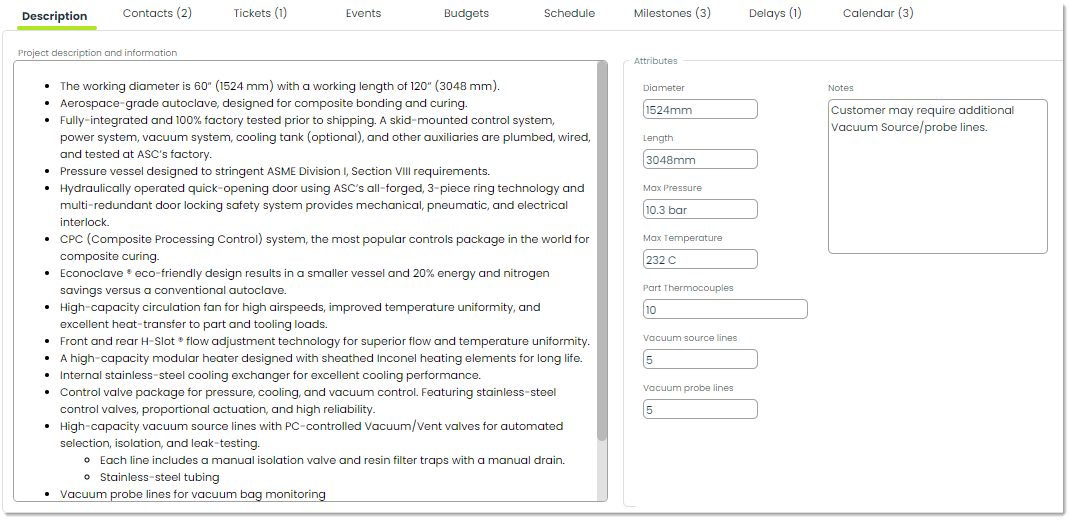
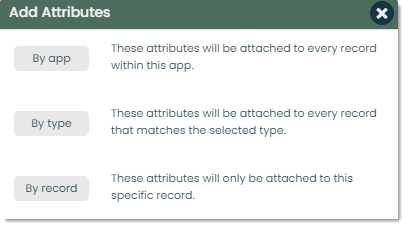
Attributes: Attributes are customizable fields you can add to projects to provide a more in depth analysis of a project. Fields can be added by app, type, or by record.
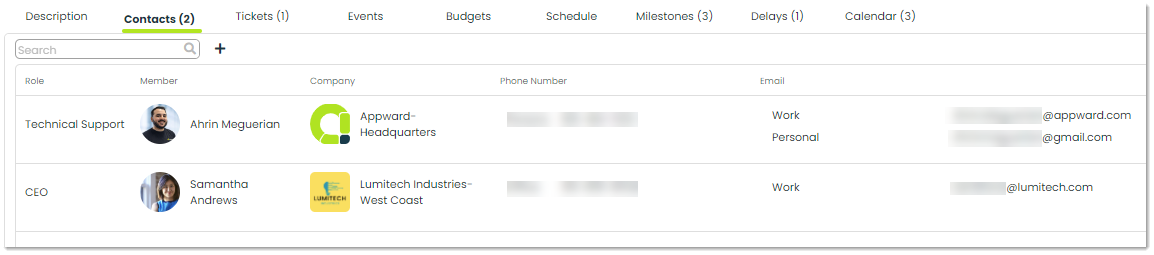
Contacts – Contacts are as a way of establishing representation between all the parties involved in completion of a project. With the built-in functionality of the Contacts app, you can manage your connections with other people whether they are employees, sales leads, competitors or anyone else. For more on Contacts, please check out Getting Started with Contacts.
Tickets – In Appward, tickets refer to a record used to manage and monitor customer inquiries, issues, or service requests. They serve as a way to document, prioritize and help resolve customer problems in an efficient manner. For more on Tickets, please check out Getting Started with Tickets.

Schedule – In Schedule you can define important dates, which can range from meetings and deadlines to milestones and project phases, and then display the duration of these events within a timeline. Having a well-managed schedule allows you to organize and visualize important dates within your organization’s projects.

Milestones – Milestones are significant events or points in a project that mark important stages of its development. They provide you and your organization with a roadmap of how the project will be executed, helping you manage project objectives and complexities.
Predecessor: A Predecessor is defined as a milestone or an activity that must be completed before the next one starts. You can define predecessors to help you establish necessary dependencies, allocate resources efficiently, and provide a fine tuned timeline.
Offset: This field refers to the number of days between the start date of the project and the milestone.
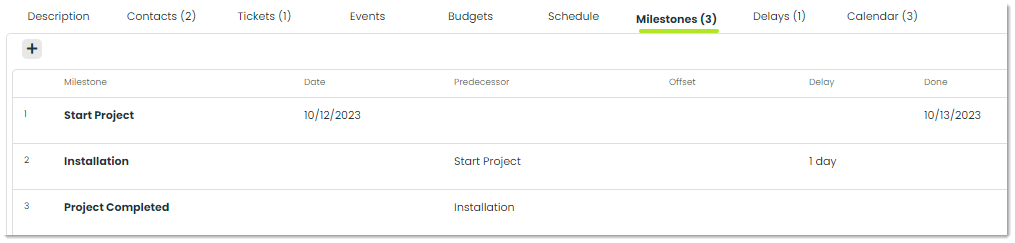
Delays – You can define delays within the Delays field. Delays are recognized as situations where a planned activity or milestone take longer to complete than originally scheduled. These delays can be caused internally by your organization, or by the customer themselves.

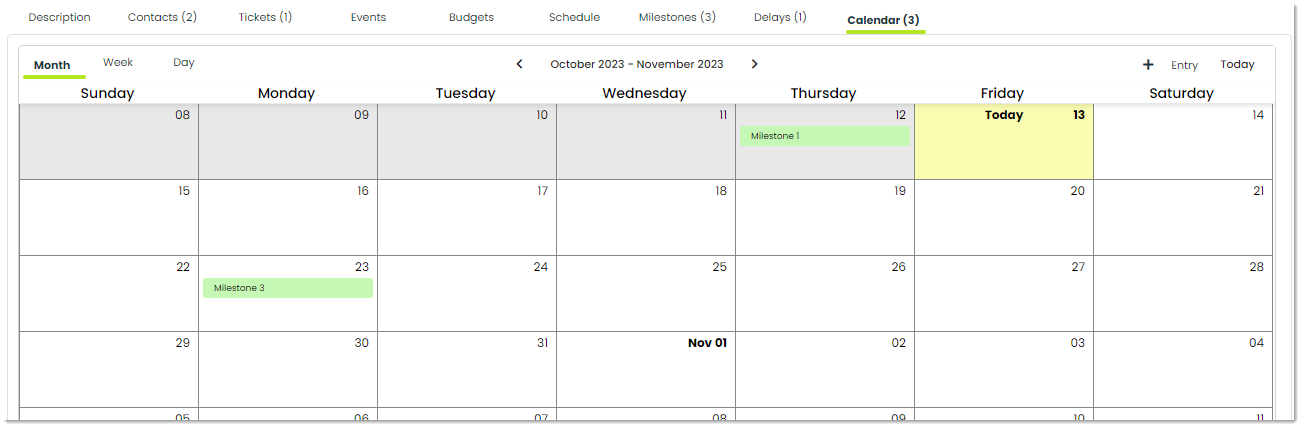
Calendar – In Calendar you can see your milestones defined in an easy-to-read calendar view.
How to view work orders in a project
In manufacturing, Work Orders assign and oversee tasks for fabricated products and maintenance. They include task descriptions, fabrication details, a bill of materials, and labor allocations, ensuring processes are efficient from start to finish. For more on work orders please check out Getting Started with Work Orders.
To view the work orders associated with the project you are viewing, navigate to the Work Orders tab. Within each row, there are some new fields you may not have encountered before, so let’s cover them.
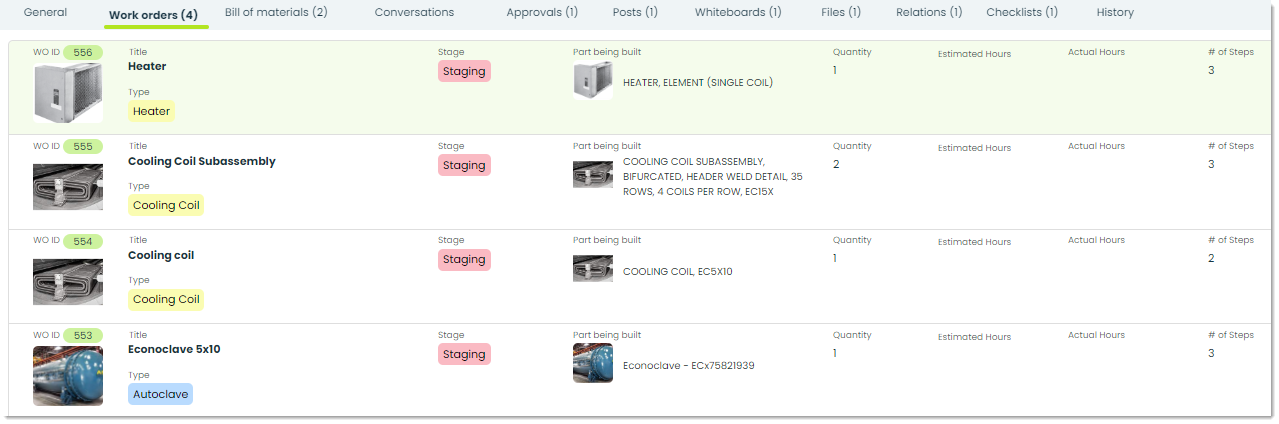
Work Order ID – A work order ID is a unique reference number assigned to a specific work order within your organization. Work Order IDs are use to track and manage work orders efficiently.

Title – The Title is a brief, concise description that summarizes the main purpose of the work order. It provides a quick and clear indication of what the subject of the work order is without going into extensive detail.

Stage – The Stage of a work order
Release: The work order has been released, indicating that the involved people have been notified of the work order and can being working.
Working: When a work order is in the Working stage, it means that the involved parties have started to work on the necessary tasks.
Inspection: After a work order’s tasks are thought to be complete, the stage will be put into Inspection. This indicates that the work order is ready to be reviewed by a supervisor to determine if it ready to be marked as complete or not.
Complete: Once a work order has undergone inspection and is determined to be finished, it can be moved to the Complete stage, signifying that no further related tasks need to be completed.

Part being built – This is the name of the part being built for this specific work order. This name can vary widely depending on the industry, ranging from intricate mechanical parts to electronic components, or even more abstract items like reports or documents.
Quantity – The total quantity of the Part being built. This number is important for production planning, inventory management, and ensuring that the right number of items is manufactured to meet demand or to replace defective or worn-out parts.

Estimated Hours – Estimated Hours represent the anticipated amount of time required to complete the work order. These hours are usually determined by the individual who initiates the work order, often based on their experience and expertise.

Actual Hours – Actual Hours represent the real-time number of hours it takes to complete the work order. The comparison between Estimated Hours and Actual Hours can provide insights into the accuracy of project planning and help identify areas where improvements may be needed.

# of Steps – This field indicates the number of steps required to complete the work order. This information is valuable for tracking progress, managing workflow, and ensuring that no critical steps are missed in the work order.

How to view the bill of materials in a project
A bill of materials is a comprehensive list of all the materials, parts, and sub-components required to manufacture or assemble a particular task within a work order. Work orders frequently rely on the bill of materials to confirm the availability of essential materials and to execute the production process with a primary focus on maintaining quality, efficiency, and consistency.
To view the bill of materials associated with project’s work orders, navigate to the Bill of Materials tab.

Quantity – In Quantity, you will find the numerical representation of the number of arts required to complete a task. It quantifies the specific count required for a given task, whether it be for manufacturing, assembly, or any other process required.

Part ID – This field serves as a way to identify and track parts that need to be used so you don’t mess up you inventory data. Part IDs typically consist of a unique number or code, to help facilitate efficient inventory management and traceability.

Part Number – Similar to Part ID, Part Number also provides benefits to inventory management and traceability. However, in this field you are also provided an image of the part which can help you further identify and be sure that the correct part has been chosen.
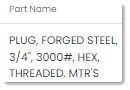
Part Name – Part Name goes beyond identification, offering a comprehensive description of the part’s name, ensuring that users have a full understanding of the part’s function and purpose.
Manufacturer – This field indicates the company or entity responsible for manufacturing the part.

Manufacturing Part Number – The Manufacturing Part Number is a unique identifier by the manufacturer to distinguish the specific part from others.

Cost – Cost represents the value associated with the part within the production or acquisition of the part.

Price per part – This field displays the price at which one unit of the part is sold for.

Transactions – Transactions keeps a complete history of part-related activities, including purchases, sales, transfers, and other relevant actions, helping track usage of parts and ensuring availability.
To include a new transaction in the bill of materials tab, you can choose to add items, request items, or designate items as used.
Add – You can select Add to introduce a completely new item to the bill of materials.

Request Items – By selecting Request Items you can request to be supplied with more of an item that already exists on the bill of materials. When you request items, a new inventory request will be generated in your organization’s inventory app. This is essential to maintaining accurate inventory levels and ensuring that you have the necessary stock on hand to complete the work order.

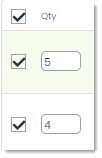
Mark as used – To mark a part in the bill of materials as used, you can specify a value under Qty and then select the checkbox next to the relevant part, or use the universal checkbox at the top of the pane to select all parts within the bill of materials. By choosing Mark as Used, you designate these parts as unavailable for future use, as they are now allocated to the current work order.

How to add Conversations
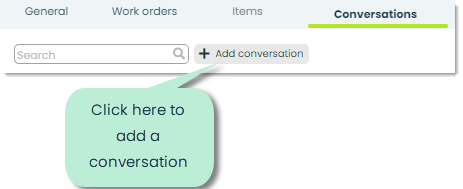
To add a conversation, press the +Add conversation button at the top of the Conversations tab.
You will then be shown a popup, confirming which type of conversation you’d like to create. You’ll also be able to provide details such as the conversation subject, style, recipient, and define any other parties involved if needed.
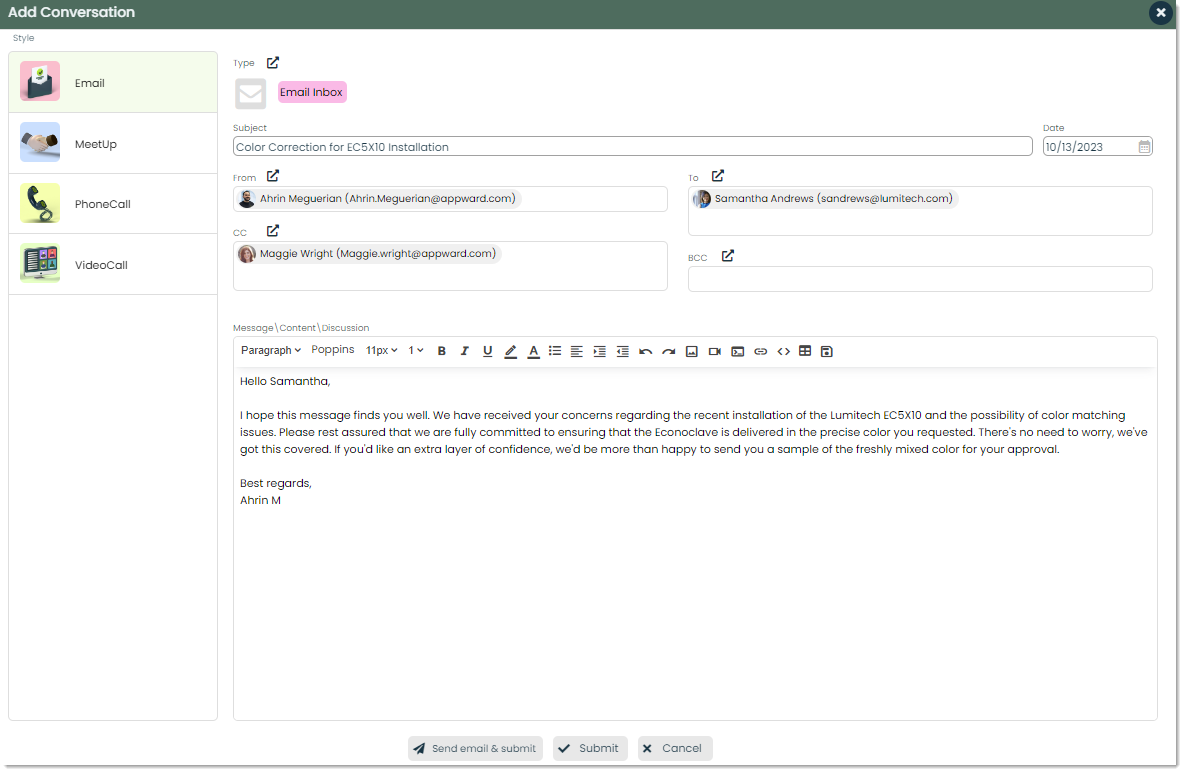
Style – This is where you can define the style of the conversation. Each style will include a different base template.
Subject – The subject of an email is a short description that tells recipients what the email is about. It helps them decide whether to open and read it. You can provide a clear and descriptive title for the email within the Subject field.

From – This is where you can see who the email is being sent from.
To – This is where you can specify who the email is going to.
CC – Adding a recipient within the CC field means that they will receive a copy of the email when it is sent.
BCC – Adding a recipient within the BCC field means that they will receive a copy of the email when it is sent, but their email address will be hidden from the conversation.
When all the details of your email look correct, you can send it out using the Send email & submit button. For more on Conversations and how they work, please check out https://www.appward.com/knowledgebase/getting-started-with-conversations/ .
How to add Approvals
An approval is a formal authorization or permission granted by a person or group of people to proceed with a specific action, request or decision.
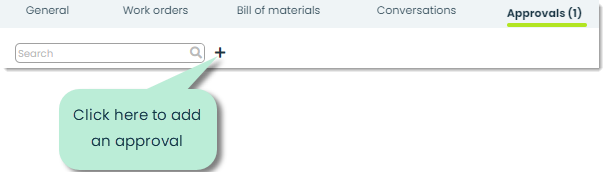
To add an Approval to your project, navigate to the Approvals tab and press the + icon.
You will then be shown the Add approval popup, where you can input all the necessary details of your approval. Let’s cover the fields available.
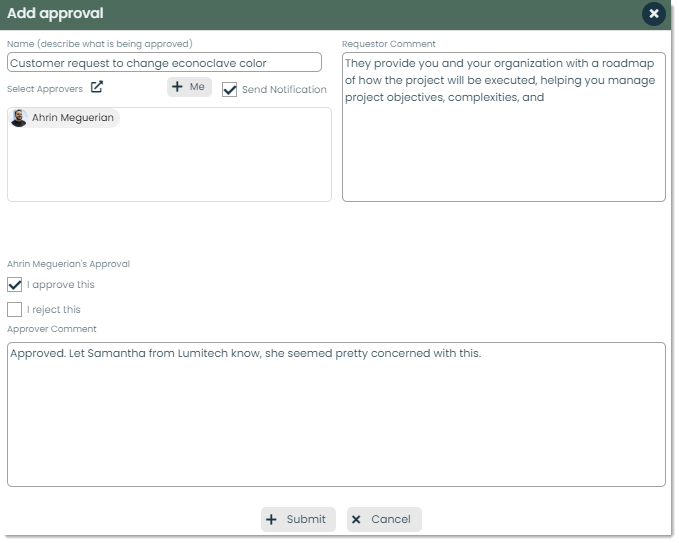
Name – You can assign a Name or title to your approval request in this section. The name should be concise and provide a quick overview of the request, allowing the topic to be easily identified at a glance.

Approvers – Within Appward, those who have the responsibility of approving or rejecting approval requests are known as Approvers. To designate approvers, simply click the icon in the Select Approvers section, which will bring up a list of selectable contacts for you to choose from. If you want to assign yourself as the Approver you can easily do so by pressing the + Me button.

Send Notification – You can send the approver(s) a notifcation by marking the checkbox in the Send Notification field. This will trigger a notification to appear in the approver’s notifications tab in their workspace.

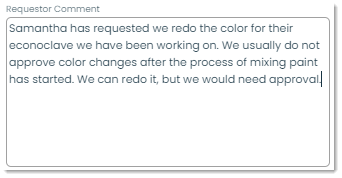
Requester Comment – The individual who is creating the request has the ability to add additional context within a comment in the Requester Comment field.
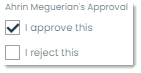
Your Approval – If you are the approver, you will be shown additional options in the popup. Options to approve or reject the approval request will be available to you.
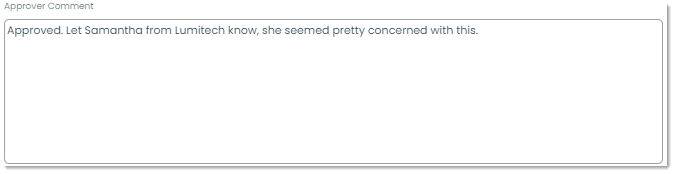
Approver Comment – After approving or rejecting the approval request, you can provide a comment in the Approver Comment field to explain why a specific decision was made.
How to add Whiteboards
The Whiteboards tab incorporates the features from the Whiteboards app that our users love the most. Using a physical whiteboard is not always practical , and for that reason we’ve recreated one of the most popular tools for productivity and collaboration.
To add a Whiteboard to your project, press the + icon within the Whiteboards tab.
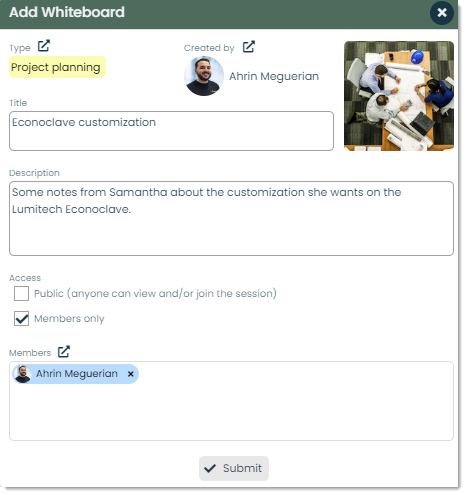
After you submit the basic details of your whiteboard, you’ll be able to view it and start using it. Whiteboards are open for annotations, edits, and can be shared among you and fellow members within your organization.

Frontline Features of Projects
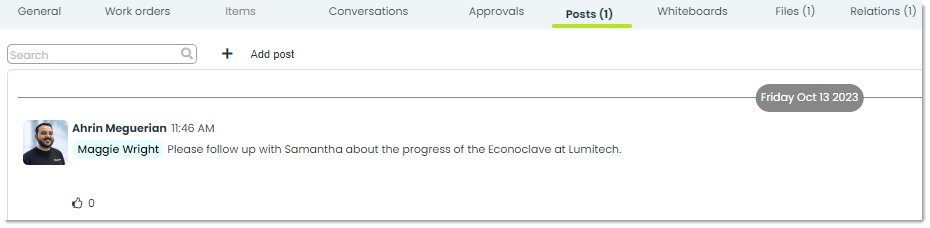
Posts – In Appward, a post is a comment that can be liked or replied to directly by other members of your organization. Within Projects, a common way of using posts is to write to parties associated with the project with any additional comments you’d like to make.
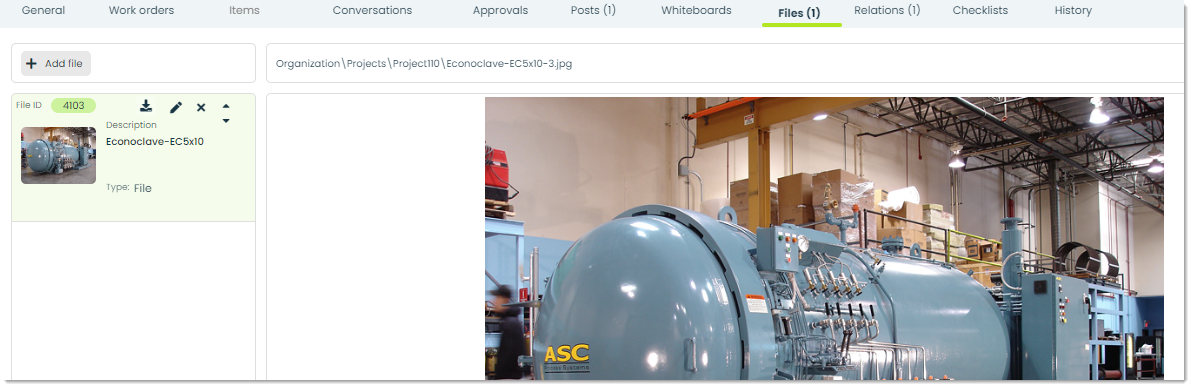
Files – Through the Files tab, you can attach essential documents to a project record. You can add files directly from your computer or from the Appward cloud. After adding a file, you can view it through an integrated document preview within the Files section. Individuals within your organization with access to the record can download the file to their personal computers.
Relations – Relations are a great option when looking to link two different records together. As an example, linking an existing ticket that is directly related to a project is an ideal way to use relations. This allows for records from both the Tickets app and Projects to be in the same, centralized location.

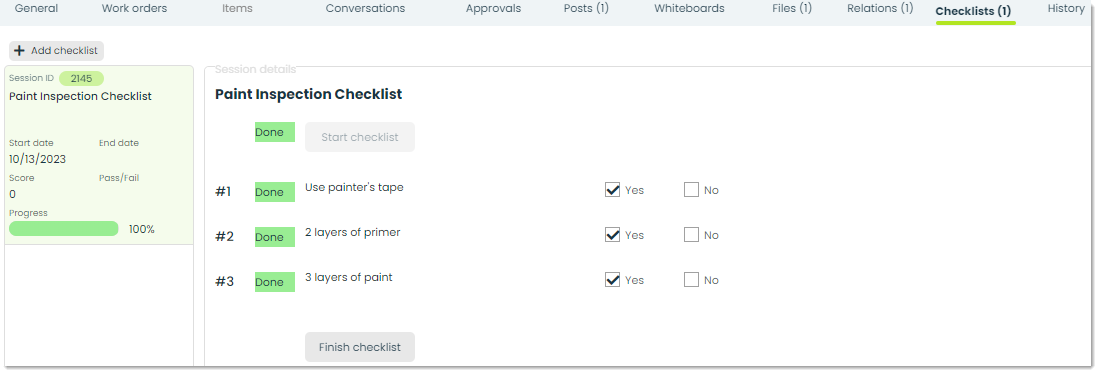
Checklists – You can use checklists to create a standardized process for a task within a project. To add a checklist to a project, go to the Checklists tab and select +Add checklist. This will open a popup where you can select from previously created checklists directly imported from the Checklist Creator app. For more on checklists please take a look at Getting Started with Checklist Creator.
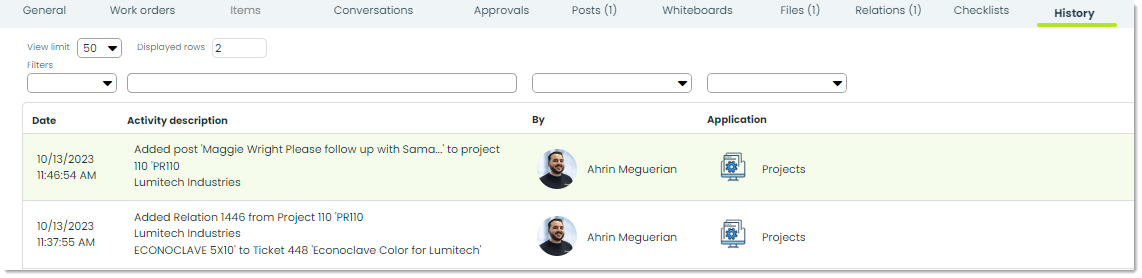
History – In History, you can view an activity log related to the project record you are viewing. You will see a list displaying the change date, activity description, change author, and the application in which it was made.
Additional features of Projects
Reminders – You can set reminders for yourself within projects, to make sure you don’t miss any steps of the process from start to finish. Assign distinct titles to individual reminders and schedule them for specific dates and times to receive automated notifications.

Follow – By choosing to follow a project, you enable notifications for specific updates. You can customize your notification preferences from a range of one to four options:
Document added: A document has been added to the project.
Project edited: Project details have been edited.
Project completed: The project has been moved to the completed stage, meaning that there will be no more changes made.
Discussion added: A new discussion has been added.

Copy – You can press Copy to create an identical copy of the project record you are viewing.

Share – With the Share button, you can share a link to the project record you are viewing. This link can be sent to anyone in your organization, so they can view the record you are referencing.

Archive – Archiving is a prevalent functionality found in most of the apps within Appward. It provides a useful tool for temporarily hiding a record without permanently deleting it. Archived records are essentially hidden from the main screen, but can still be accessed using specific search filters.

Delete – To permanently remove a project record, simply click the Delete button. An additional confirmation popup will appear to verify your choice, but please be certain, as this action is irreversible.
