Table of contents
Getting Started with Documents
Thursday September 14, 2023-13 min readIntroduction
Documents is designed to help you create a comprehensive library of documents and media assets essential for everyday operation of your organization. Fully integrated with the Appward platform, your documents can be accessed from any app securely and efficiently. In this guide we’ll cover how to upload, download, and manage files within documents.
Let’s get started
To open the Documents app, go to the Productivity category of the main navigation bar and select Documents.
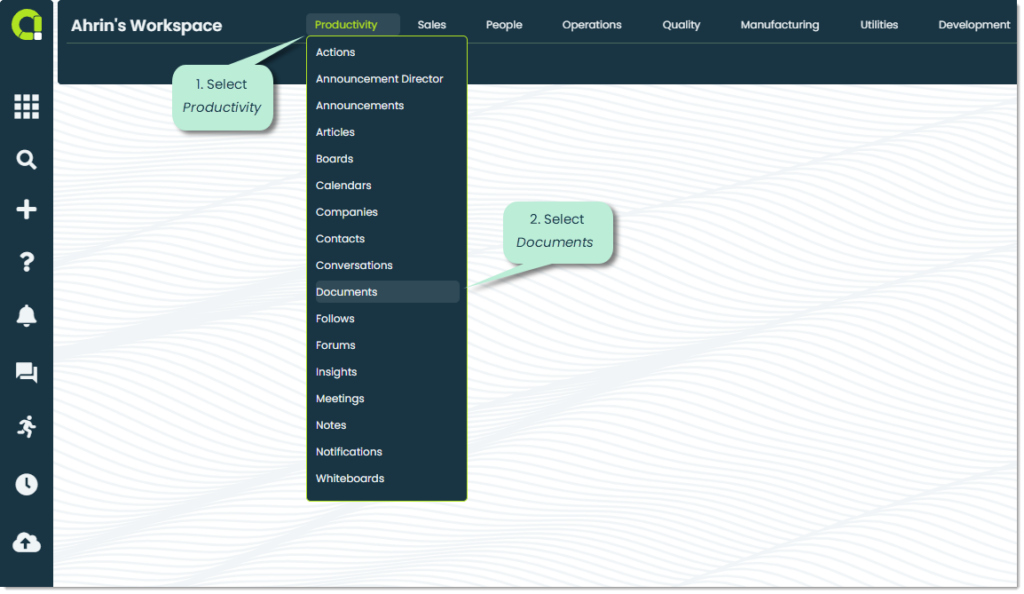
When you open the app, you will see a screen showing you all the previously uploaded documents within your organization. Let’s cover what each tab has to offer.
Note: If your organization has never uploaded any documents, then this screen will be blank.
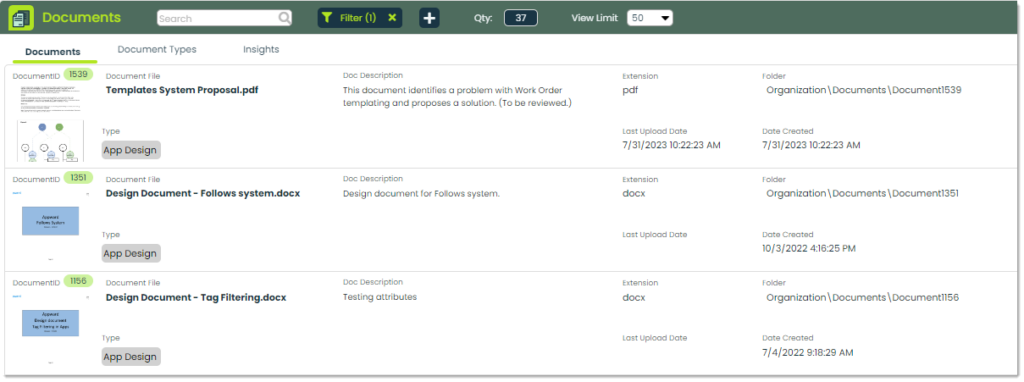
Documents – This is the default tab when you open the Documents App. It displays a list view of all documents available within your organization, ordered by most recently uploaded.
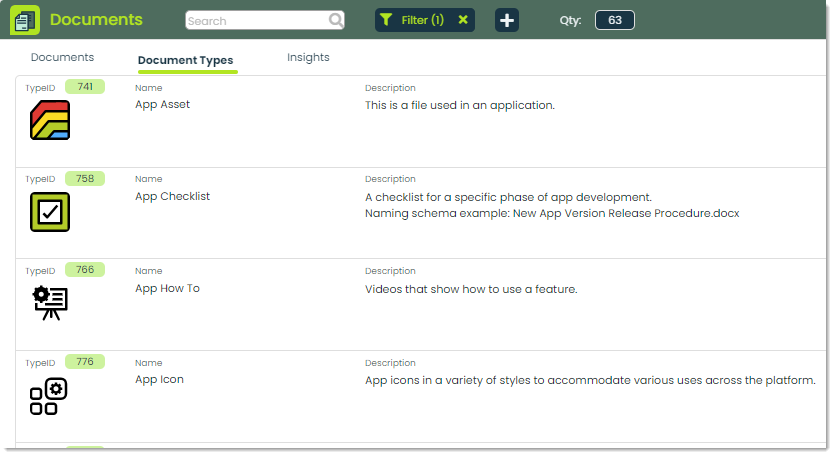
Document Types – In Appward, Types are a helpful way of categorizing your information to make it easier to sort, find and get insights from your data. Document types refer to different categories or classifications of documents based on their content, purpose, format, and usage.
Note: If your organization has not uploaded any documents, this screen will be blank.
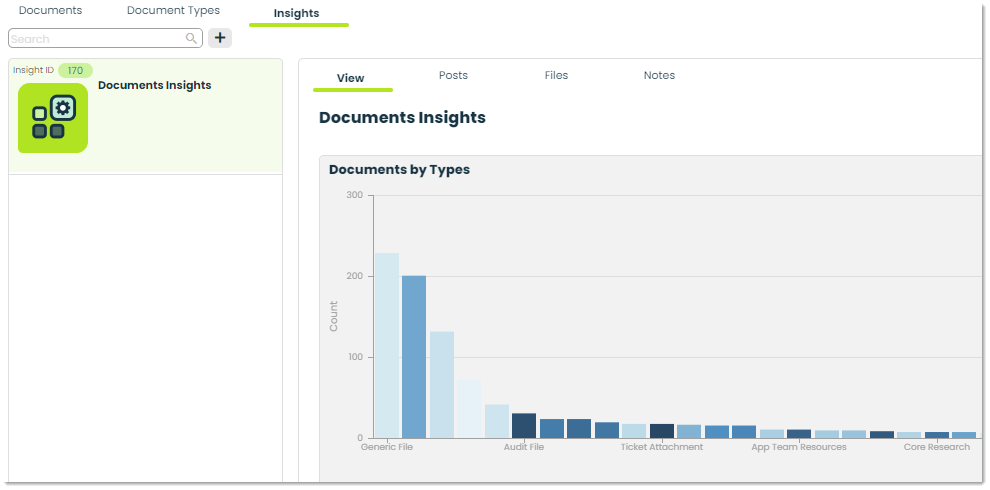
Insights – This tab serves as a data analysis tool for your documents. You can set up customized SQL queries to gain valuable insights from your document data, including details about document type or size.
How to upload a document
To add a new document to your organization, you can do so by clicking the + button at the top of the app screen.

After you do so, you will be prompted with a popup for adding a new file.

Once you have selected your preferred file upload method, you will be prompted with one of two popups depending on if you click Select from your computer or Select from Appward cloud.
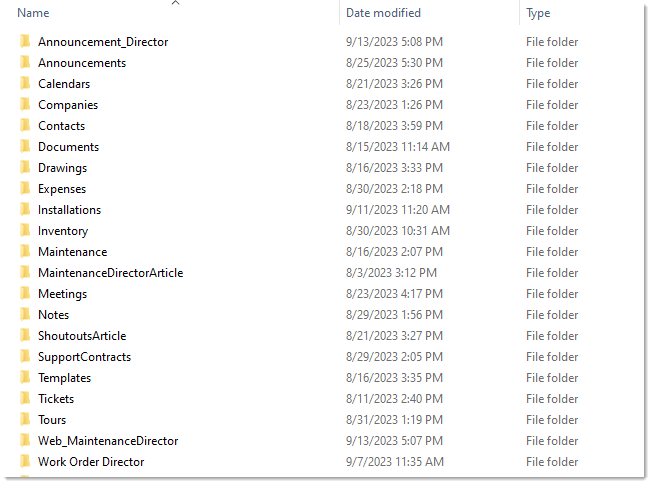
1. Local File Explorer – Select and upload files form your current computer. You can use this method if the file is currently stored locally and not previously uploaded to your organizations file explorer.
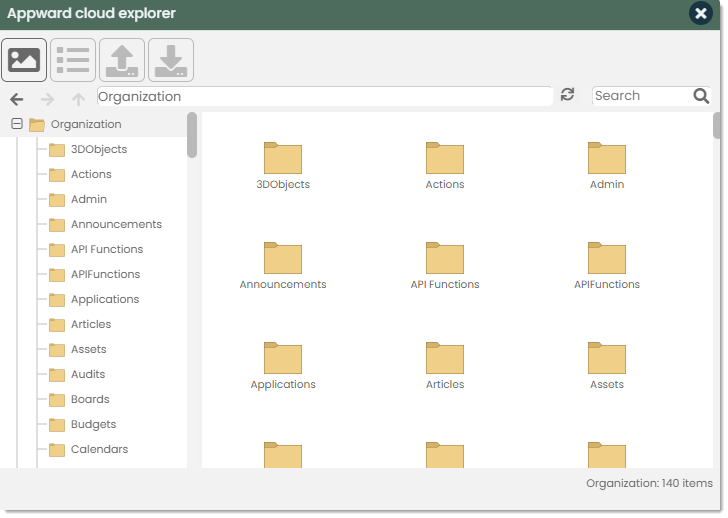
2. Appward File Explorer – Accesses the Appward cloud file explorer and allows selection from cloud files in your Organization, Personal, or Public folders. You can use this method if the file you wish to access has been uploaded to the Appward cloud previously.
The next step is to add all of the necessary details for your document within the Add New Document popup. Let’s go over the fields available in this window.
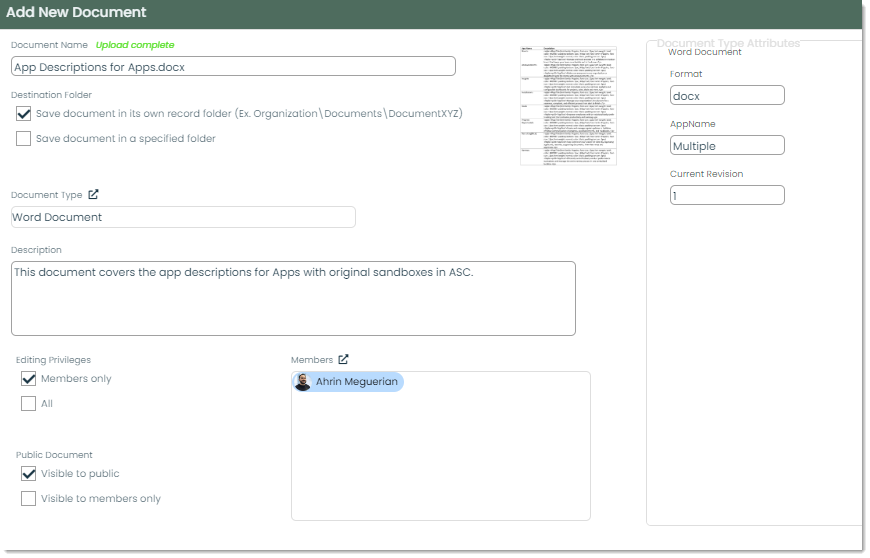
Document Name – In this field you will be shown the original name of the uploaded document. This field provides uploaded documents with a unique name to help identify it among other files or documents. Having a clear and meaningful document name is important for organization, retrieval, and management of your documents. You can rename the document as many times as you need to.

Destination Folder – This field refers to the location of where a document will be saved. You can either save the document within a newly generated folder in your organization’s file directory or select a particular folder that isn’t preselected by ticking the checkbox with your choice.

Document Type – In Appward, types are a helpful way of categorizing your information to make it easier to sort, find, and get insights from your data. As an example, Types can be used within Documents to distinguish between Word Document, Video, or Powerpoint.

Note : If your organization has not created any document Types, the Document Type picker will be empty.
Description – In Description you can provide a brief and concise summary or caption about what details are highlighted in the document you are uploading. Descriptions generally serve as a way for the reader to asses whether a document is relevant to what they are looking for and if they should spend time reading it.

Members – Within Appward, members refer to individuals within your organization who possess the authority to modify, view, or delete specific records. You can include members in a document, granting them the privelege to both view and manage the uploaded document. This guarantees that all relevant people who should have access to the document’s information will be able to do so.

Editing Privileges – You can easily determine who has the ability to edit document information within the Editing Priveleges field. By ticking the Members only checkbox, you are agreeing to allow only previously defined members of this record to make edits. You can also make documents open to all by ticking the All checkbox, which will then give editing permission to anyone who can view the document.

Public Document – You can provide visibility priveledges to a document within the Public Document field. You can tick the Visible to Public field to provide visibility permissions to anyone within your organization. Conversely, you can tick the Visible to members only checkbox to only allow defined members of the document record to view the document’s content.

Document Type Attributes – Attributes are characteristics or properties that define different types of documents. As an example a document with the type “Word Document” could have the attributes of Format, AppName, or Current Revision.
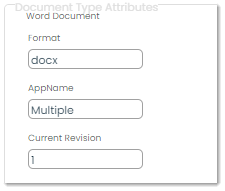
Note: The definition of attributes can vary for each type based on your organization’s specific requirements.
How to view and manage Documents
After uploading a document, you can access its details by clicking on it within the Documents tab. A flyout will then appear, allowing you to view comprehensive information about the document and providing options to download or update it.

Within the details flyout, you’ll notice some familiar fields previously discussed in this guide. Let’s review each of the newly introduced fields.
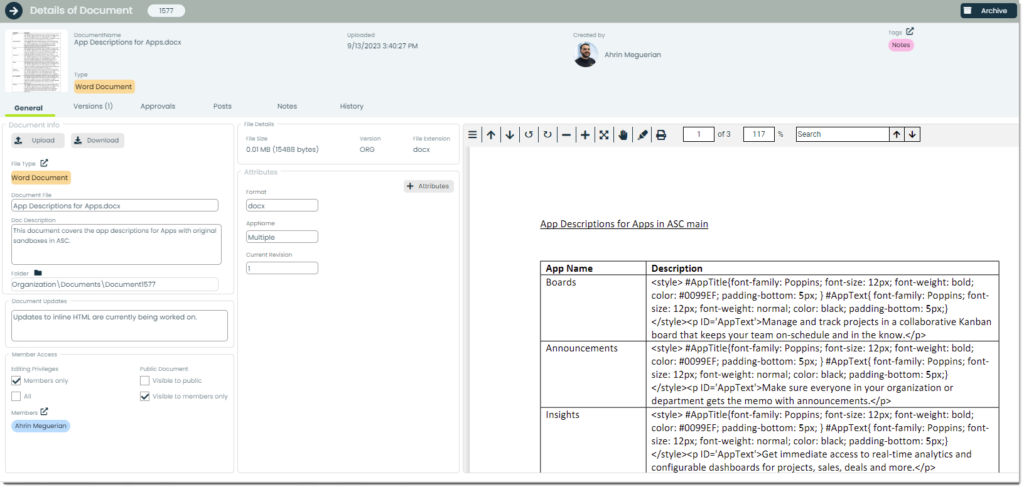
Upload/Download – When viewing the record of a document, you can Upload or Download associated files. If the record already contains a document, the document being uploaded will be defined as a revision of the original upload.

Folder – In Folder you can view and edit the folder location of the document.

Document Updates – You can provide comments or additional details within the Document Updates field. This is especially useful during the approval process of a document that has multiple phases and revisions. If a document requires a quick update while uploading a revision, you can do so in this field.

File Details – File Details refers to the information or metadata related to a file. Some examples of file details are version, extension, and size. You can utilize file details to efficiently manage and organize your organization’s digital assets.

How to use the Frontline Features of Documents
Within Appward, many applications contain a collection of components referred to as Frontline Features. You can access these features by navigating through the available tabs within the document details flyout.
Versions – Document versions refer to different revisions of a document that track changes and updates made over time. You can keep track of how a document changes, and have direct access to previous versions of a document when necessary.

Approvals – Document approvals play an important role in ensuring documents are accurate, compliant with regulation and aligned with what your organization wants to accomplish.

Posts – A post is a comment which can be replied and reacted to by other users in your organization. You can write a post to ask questions or remind a colleague about a revision that needs to be made to a document.
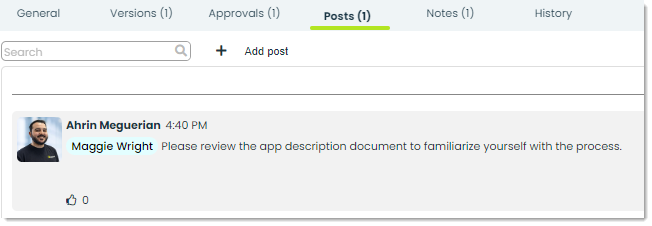
Notes –The Notes tab is where you can write and store brief written records that capture information or thoughts. You can use these notes to stay organized, provide better context to documents, or to improve communication between you and your team.

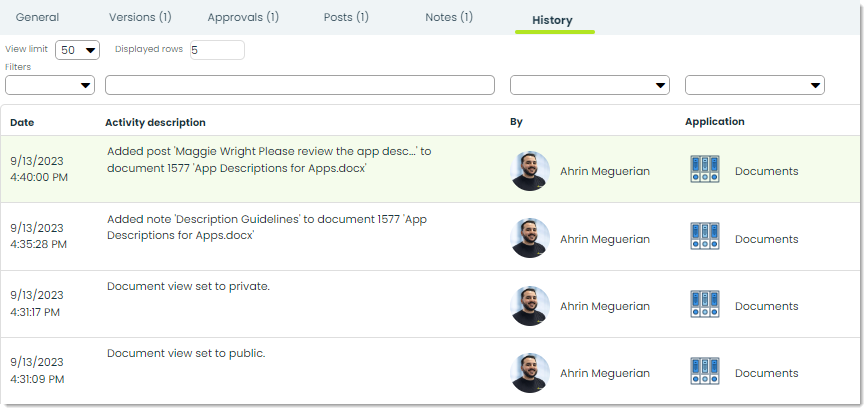
History – You can monitor changes and updates made to a document through the History tab. Within this tab you can track the changes made, date of change, and the individual responsible for making the change.
How to use additional Documents features
Reminders – Reminders are a prevalent feature in many apps within Appward. They operate by automatically notifying users to review specific records at certain time intervals. When it comes to documents, reminders are highly valuable in keeping your organization informed about pending document approvals.

Archive – Archiving is a common feature within the majority of apps in Appward. The Archive option serves as an effective tool when you wish to remove a record from sight without permanently deleting it. Archived records are essentially concealed from the main screen but remain accessible through specific search filters.

Delete – To delete a document entirely, you can do so using the Delete button and removing it permanently.

Tour – Tours can be found within most apps at Appward. They are designed to give you an interactive, step-by-step walkthrough for the application you are accessing them from. You can utilize tours as an efficient and easy-to-use onboarding solution.

